Garden hose water shutoff: Best practices

IMG_3354

Really?  Answer is Yes, there is a improper way to do this.  Do you mean turning off a shut0ff? Yes already, also we will explore some good practices for how the pipes should be laid out that are attached to that valve.

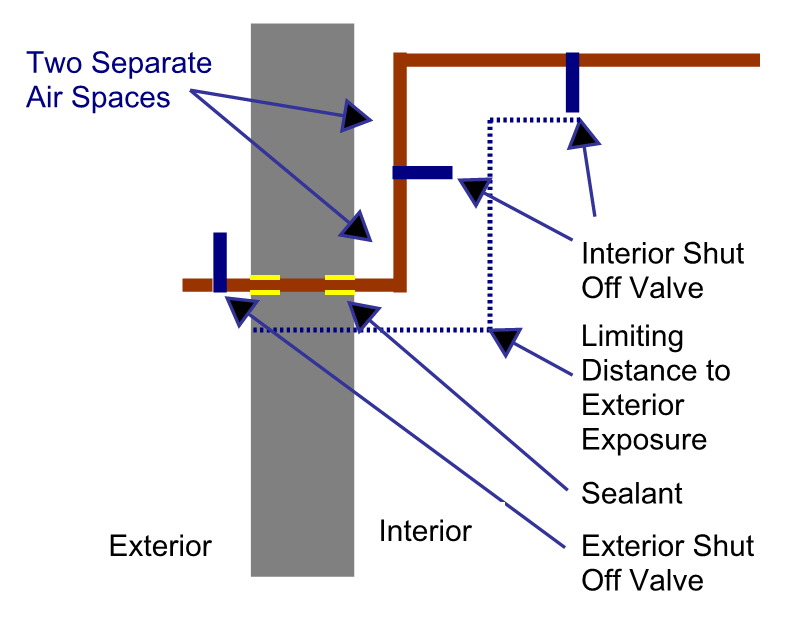
The most common error made is that the water shutoff valve is closed on the interior, but the existing water between the shut-off and the exterior valve (where your garden hose is attached to) is not bled out of the system.

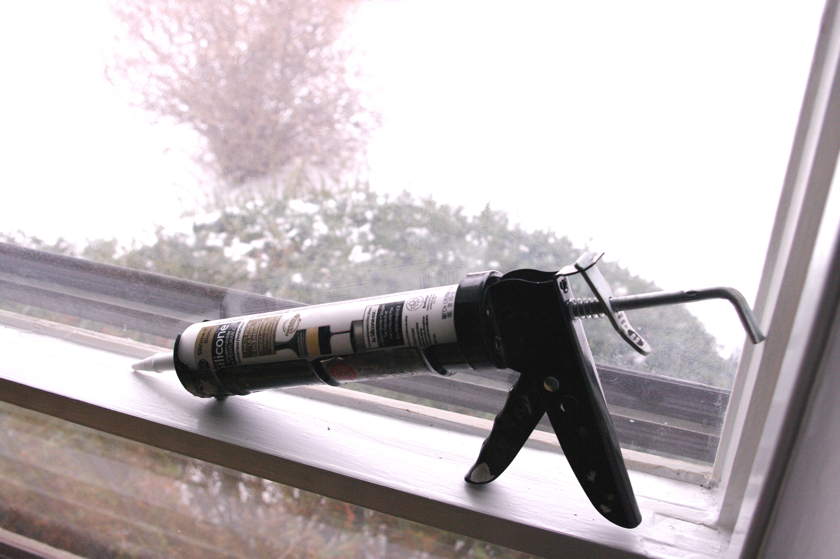
First you must shut off the water from the inside, and then open the outside valve and let the water trickle out.  When the water is removed, you then close the outside valve Why?

As we know, when water freezes, it expands, and your pipes burst.  In contrast, frozen air does not expand, and your pipes are safe no matter the temperature of the air.  Pipe bursting is quite common, as copper is very thermally conductive, and has the potential for heat to be lost quite easily from this connection.


garden hose shutoff
This valve is closed and shut off properly. The bottom half of the valve goes to the exterior of the house, and water was bled out if it to fill it with air.   We are assuming that the space where the valve is located is conditioned and not in a crawl space.  Crawl spaces require extra precautions.


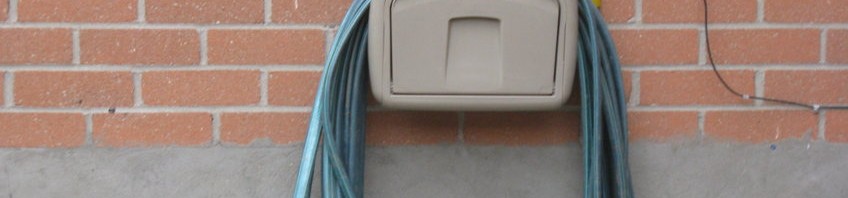
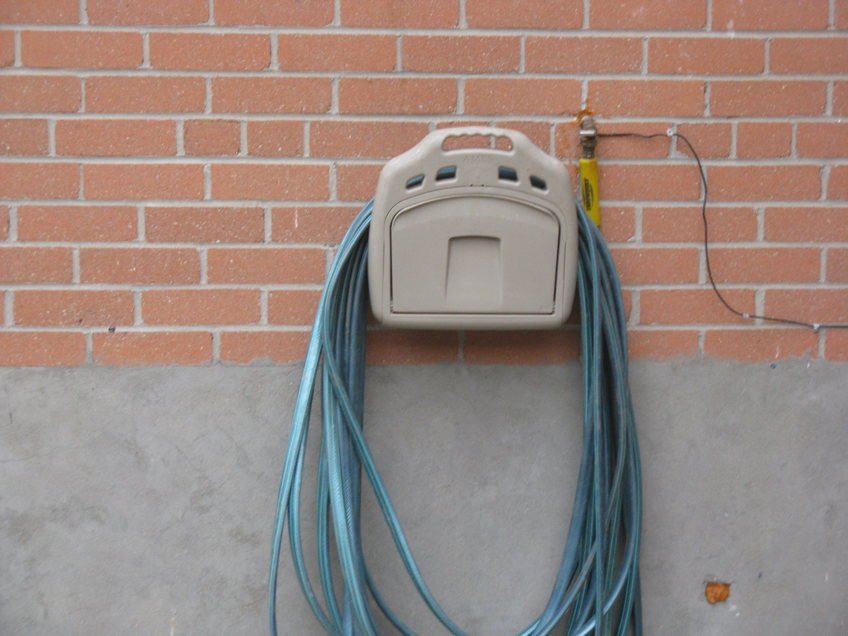
The farther your interior shut-off valve is from the external temperature exposure, the safer the pipes are.  This is all assuming that the location of the shut-off is in a conditioned space.  This is assuming that your penetrations are sealed with silicone at the cladding, and spray foam in line with the insulation.  The diagram above used an old rag.  I was there at it seemed pretty air tight.  Hats off!

shut off diagram
The farther the interior shutoff valve is from the exterior exposure, the safer the connection because the copper pipe has a larger chance of being heated the farther away it is from the exterior exposed air. It is also essential that you seal the penetrations with spray foam in plane with the insulation, and silicone at the cladding

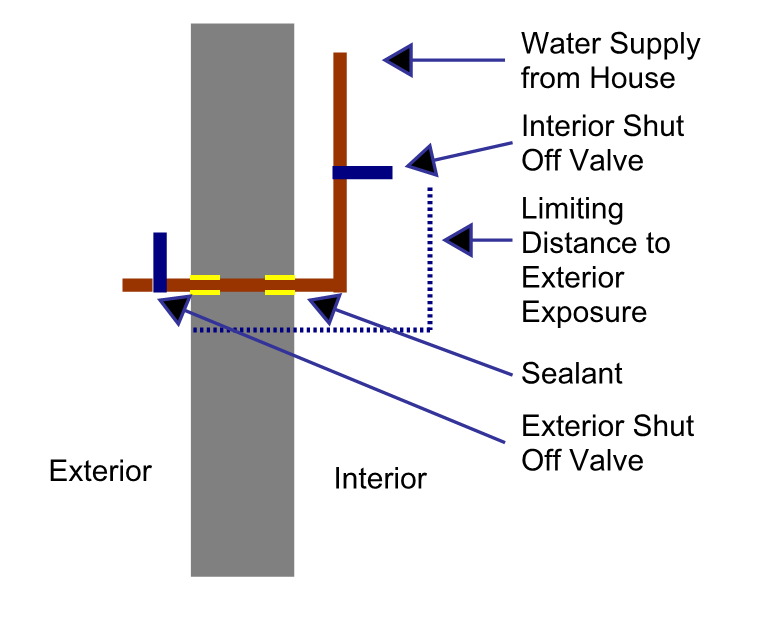
By increasing the distance the pipe is filled with air, larger the chance it is heated by the ambient temperature.

There are specialty valves such as silicock valves can also work by shutting off the valve on the interior.  You need to make sure that your valve has a seal on both the interior as it is designed to do and the exterior.  I am not sure all silicock valves have a seal on the exterior.  If there is no seal on the exterior, it is useless as you need to create an air space between the two shut-off valves.   Remember that air spaces create insulation value.

Think of this system like a window.  We know that triple pane windows insulate better than double planes, not becuase the glass has insulating value, but the separation of the air or (argon) spaces.

The principle is the same with shut offs.  If your building envelope is constructed in such a way that you know is problematic, there is no reason you can separate you pipe into two air spaces like a triple pane window.  This method will be far more effective than  a single silicock valve.

two seperate air space v3
Two separate air spaces are better than one.  This method is far more effective than a single silicock valve

Is it overkill?  Depends on your home.  The main lesson here is think about these pipes are though you are trying to make it harder for the cold air from reaching the interior (technically, the heat from escaping).

Active Systems

Sometimes extra heat is required to keep the pipes from freezing.  Heat trace cables can be used which wraps around pipes and plumbing fittings.  For just a little extra money, you wish, you can connect them to a temperature controller that turns on the system at a particular temperature.

Buildingology lessons learned

  • Try to create air spaces inside your pipes
  • Two air spaces are better than one! (Think of insulating like triple vs double paned windows)
  • Sealant around pipes are crucial to prevent windwashing
  • The larger your limiting distance, the larger the chance the pipes will be heated by ambient air.
  • This set of rules if for conditioned interiors only.  The air space principle can be applied for crawl spaces as long as you have a shutoff in the conditioned space
  • Heat trace cables can be used if your pipes if not enough heat can be drawn into the pipes and fittings

Expired sealants and caulking: Check them like eggs.

caulking gun

We don’t think to look, but sealants (caulking) do expire so check the date before you buy.  Most companies will put an expiry date on the sealant itself.  When buying a loaf of bread or eggs, usually you can push the date a little if need be, but I don’t advise that with sealants or construction adhesives, especially with silicone.  Old silicone has the tendency of not curing properly.  What happens is after you apply the silicone, it is still “wet” and never cures.  Save yourself some trouble and dispose of old sealants. Usually the sealants are good for about 12 months or so.   Some other less expensive sealants like acrylic (alex plus is a good example) have a similar shelf life, however from my experience, you can push it a little longer if you expect little movement in your application as the acrylic tends to set (dry out) rather than stay wet as with silicone.

Buildingology lessons learned

  • Check the expiry date of all sealants
  • Don’t use expired sealants, or you will end up having to clean it up.

Shower benches and knee walls: How to prevent water leakage

Greatly detailed knee wall.  There is an overhang, and a clear silicone drip edge created just under the lip.  If you have trouble seeing it, that’s a good thing.


It is all too common that in showers, water leaks into the wall causing damage to the studs insulation and substrate holding the shower in place.  This usually happens happens from a crack in the grout from where one shower wall meets another.  The leakage that usually causes this type of damage is very often a small of water adding every day as you take a shower and occurs over the course of months, years and possibly decades.    It can also happen between shower grout, but that usually occurs in older showers.  Usually.  But that will not be the focus of this article.

Do not use grout in shower wall corners or under benches

Grout cracks
Grout cracks due to inability to accommodate movement.  The crack is very small but it is enough to leak water in the walls.  This small leak can swell the wood structure causing the crack to become larger, and more water would enter.  Within a few months or years, a crack like this can soak the wood frame behind it to rot and cause mould.  Fortunately I caught it soon after installation, and fixed the problem wit a bead of silicone on top in addition to the silicone drip edge (discussed later)


The issue with grout is not so much that it cracks, but that is has no accommodation for expansion movement like any masonry based product. Every concrete building has steel rebar to counteract the expansion forces.  This has nothing to do with the way it was installed, it is just a characteristic of a home with a wood frame that moves with seasonal humidity fluctuations.  Everything moves even to such a small degree as seen in the photo above.  Look how small the horizontal crack is.   So during your installation, you must plan for this eventuality.  You might think bah, that crack is tiny, whats the worry?  I can tell you that it is big enough for water to enter, and that is all that matters.  This scenario leading to failure is more common than you may think.  The solution is  twofold.  Do not install grout in the corners flush to the tile because grout is so strong in compression, it does not allow for as much movement as no grout.  Those walls need the ability to move towards each other without the grout in the way.  It is possible that the surrounding tiles crack or adjacent grout joints to fail because of having the grout there.  The best solution is to put grout a small amount the corners, and not very deep.  The intention would be that the grout provides a substrate for your silicone sealant on top.  It helps provide continuity, but don’t expect it to stop water.

So how is that problem addressed?


It is actually quite simple and for those of you who have older showers, you can do this too. Just make sure your tiles are as clean as the day they were installed.  You must have no soap scum on the surface or it wont work, so give it a good scrubbing.  Just install thick dose of silicone sealant on top of that grout, and that should be the finished product.  It is definitely most difficult to tool the silicone over natural stones like this one, and doesn’t provides the cleanest look.  In this scenario the walls can move and the joint will not delaminate or crack as silicone can accommodate the movement.

This is not the cleanest look, but it give you less headaches in the future

Just a note about the silicone:  Quality tile stores sell acrylic sealant that closely matches the colours available.  That is great, but the only issue is that acrylic sealants don’t accommodate movement as well, and have a much smaller service life especially in regards to mould.  The mould will appear much quicker if it is in contact with a lot of water which looks disgusting.  This is not “A” brand vs “B” brand, it is just the properties of the acrylic, additives included.  Silicone is the best choice, however the palate is very limited to about five colours.  My favourite silicone is “GE silicone II” sold almost everywhere, but it is more expensive at about $5-6 each.  Two tubes should do an entire shower with some left over.  If your shower or bathtub drains correctly, the silicone can last upwards of 20 years or more.

Create a drip edge using silicone

Creating a drip edge such as this one (its hard to see because the silicone is clear)  allows the water to fall straight into the pan, as opposed to running down the wall

In addition to putting silicone in the corners, applying a bead of silicone under the edge of the lip creates a drip edge that ensures that water doesn’t run down the wall, but instead falls straight into the pan.  Don’t expect your contractor to do this unless you ask for it.  Drip edges are vitally important for reducing water entry into a wall.  Drip edges can also be created during the installation by cutting a thin line (saw blade thickness) on the underside of the tile where the lip is exposed.  I don’t like this method as much, because in a shower setting,  not everyone remembers to seal the tiles in the new crevasse that was created with the saw blade, which is hard to do.

Buildingology lessons learned

  • Always use silicone in the corners of every shower
  • Silicone is better than acrylic sealant in terms of mould resistance
  • Dont use grout in the corners of the shower to the finished edge.  Given enough time, they will crack
  • Always overlap shower benches and knee wall lips
  • Create drip edges under knee walls and shower benches

Sanding Hardwood Floors? Test for lead first, and remove it safely

How to test for lead

Recently, It was time to sand some floors as the wear level was low.  Some hardwood floors installed 1977 or before contained lead in the finishing layer.  Having lead in the floors was very regional and installer specific.  Some areas of North America never had any lead used in the finish at all.  Some people liked to use lead, some didn’t.  I went to my local hardware store and bought a lead test kit at about $10.  Make sure you test it in an inconspicuous area, maybe in a closet where the finish has not been disturbed too much.  After my test was complete, it was very apparent that there was a positive result as you can see from the photo.  If you get a positive result, it is a good idea to get that result verified from an environmental testing company.  In this case, a piece was ripped out from the hardwood from the closet.  I had dropped it off at my local environmental testing company, who verified a 1% lead content.

The dangers of sanding floors

Sanding and retaining and applying some new polyurethane on a floor without question can save thousands of dollars instead of replacement, however if you should not sand your floors at all, that has lead content.  Some companies have some excellent equipment that they market as able to capture 99% of dust or even more.  These dustless systems are fantastic from reducing the absolute chaos of dust getting everywhere involved with sanding a floor even when the room is depresurized.  Remember that the issue is not just about the amount of dust in the air, but the size of the particle that these systems can catch.  99% sounds like alot, but is no where near safe.  Dust particles are not easy to control.  If you are at all familiar with sanding  you will know that the only true method to reducing dust particles is to literally use plastic to encapsulate a room.  Not many lead particles are needed to be inhaled cause problems with your health.

Test it yourself first for one good reason, dont rely on your contractor.

The reason is quite simple.  Most hardwood installers don’t test.  You will know if your contractor tests for lead in your house because the testing kit has a very strong distinctive smell that will fill up the room,  it is very pungent and unpleasant.  I spoke to a reputable installer in Toronto and said to me “I have not come across that in 25 years”.    In a cookie cutter post WW2 house, and I can tell you many others on the same street probably had it too. This reputable installer just didn’t test over that time.  If you have had your floors sanded recently and are concerned about airborne particles, most environmental testing companies provide on-site air testing to determine if the air is safe.  Lead particles do not stay in the air too long and settle, but end up in unwanted places making cleanup more difficult.

Safe removal

Standard practice of hardwood removal with no lead content is to cut the floor with a circular saw in 4 foot strips which are easy to manage.  When I was discussing removal methods with the hardwood flooring installer, they glazed right over this point, which also adds a large amount of dust into the air.   So if you decide to let them do it, they better not cut strips in the floor. The method that was eventually used, was removing one plank at a time, without damaging the finish.  It was easily more than twice the amount of labour, but lead particles did not end up in the air.  Usually the environmental testing company will have project managers to guide you on other proper removal techniques.  Lead abatement will cost approximately the same as new hardwood floors, so most of the time, it is better just to remove it.  When thinking from an environmental standpoint, dangerous particles that are contained, or not airbourne is always favoured over airborne (Think of CO2 in the air vs CO2 capture).  Removal is most likely the more environmentally friendly choice.  Different jurisdictions will have different rules about disposal of lead content boards.

Buildingology lessons learned

  • Always test for lead yourself first with an inexpensive test kit if you decide to sand your floor
  • If a positive result appears, verify from your local environmental testing company
  • Never sand a floor with any lead content, even if it is lower than 1%
  • “Dustless” sanders from professional flooring companies are effective for minimizing dust, but are not perfect, and not suitable for lead removal.
  • Standard strip cutting removal methods can’t be used.
  • Most environmental companies employ project managers who can guide you in proper procedures.
  • Entrapped lead in your hardwood is more environmentally friendly that releasing the lead into the air