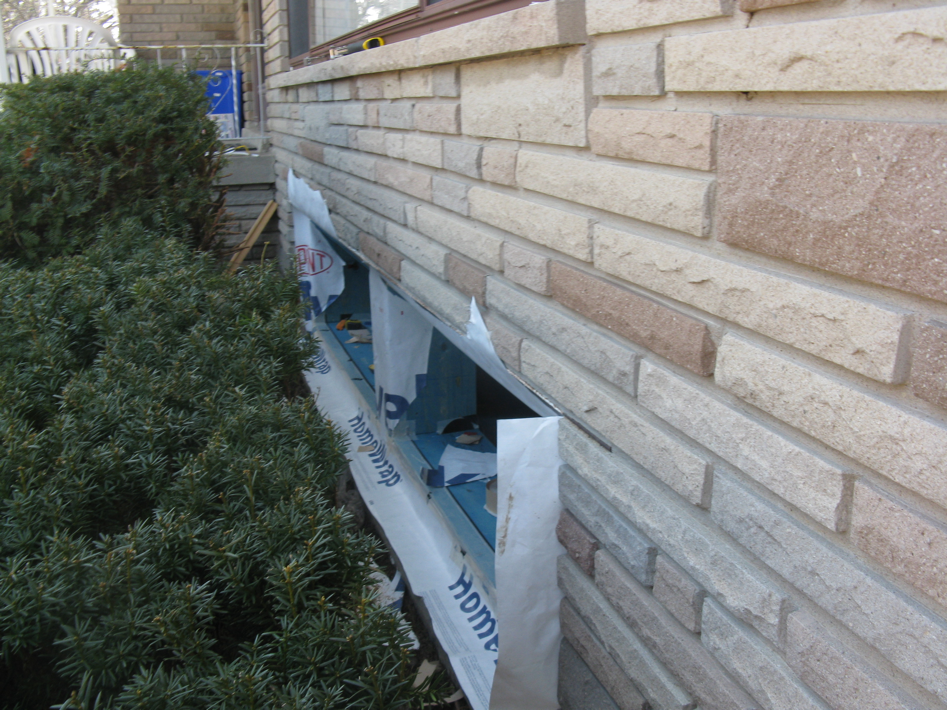
There are many different methods and materials that can be used to flash a window. I will show you some of the advantages and disadvantages of each, and the the creative solution I developed, and why I think it is one of the better ways of flashing your window. This post will not cover fluid or trowel applied membranes
There are generally two categories of of sill pan flashing:
Plastic kit sill pans
This method uses a piece of formed plastic to fit on top of your house wrap weather resistant barrier (WRB). They are sold in kits by various manufactures. It is important to order one that includes a back dam. A back dam ensures that any water that falls on top of your sill does not move towards the interior.
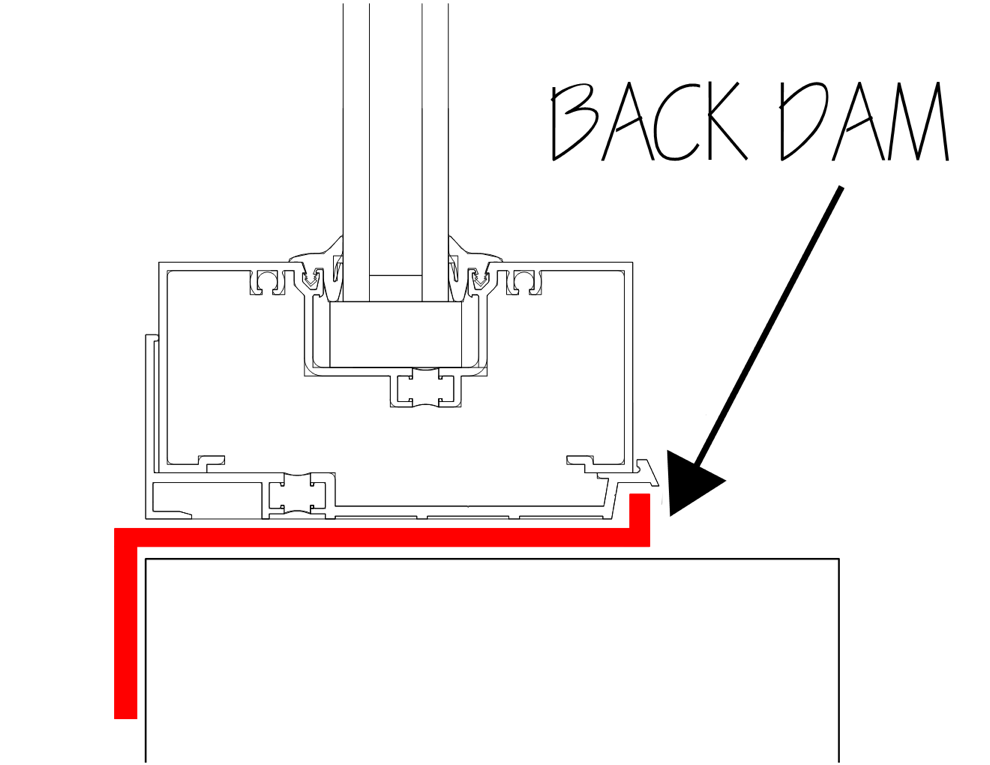
Kits usually come in two or three pieces. I believe the two piece kits are better because they don’t have a seam near the corner of the window which can be a problematic area for leaks. I’m not saying the three piece kits are bad, it is more like extra insurance. These plastic kits must be taped or sealed with compatible sealant (caulking). If you use any old off the shelf sealant, it most likely not bond or melt the plastic or WRB. I used Dow Corning’s 758. (It is now a favorite of mine as it has many uses). These dams still have to either be flashed or sealed to the substrate.
This method was how I was originally planning on flashing my pan, but I learned the hard way that you have to order ahead of time to obtain your flashing…… many weeks ahead of time to have the pan arrive on your front door. In some areas of the country, your local independent building supply yard may supply these. I had a lot of trouble finding them in Toronto or even in the rest of the country for that manner.
One major advantage these pans have in comparison to tapes or membranes is that there is less build up in the corners.
One major disadvantages is that you must know the exact installed depth of your window because the back dam can interfere with interior finishes or not sit all the way behind the window.
Membrane and/or tape method
Self-adhered membrane
This is a very common method used. A bituthene membrane or Henry/Bakor’s Blueskin membrane is another option which is about 0.9mm thick. Be sure not to use the below-grade version which looks almost identical and is almost 1.5mm thick. This brings us to a disadvantage of using these types of membranes, it’s thickness. The buildup can change the dimensions of your frame in the corners very quickly if you need to put 2 or 3 or even 4 layers of overlapping material to your frame. You need to account for this when measuring your window.
Another disadvantage of using this membrane is that some substrates require priming for the bituthene membrane to bond to it. The primer is a messy nasty process. When attached to your WRB, these membranes also have a tendency to peel under its own weight over the years, so you still have to flash seams at the top with flashing tape. Reading the technical data sheets before using it is a must.
The biggest disadvantage is when using this method is that you need a sill angle in place or some other method to act as a substrate for the back dam so that the blueskin has something to adhere to. Without a back dam, this method is a deal breaker for me. A back dam is cheap insurance to a real potential issue.
Why would someone use this? You can cut it to size on site, no worrying about ordering ahead of time and it is a very durable, effective material if used properly.
Tape
When I hear the word tape, there is a negative connotation that goes with that word. Most likely due to previous experience of tape not adhering well to substrates in general. Flashing tapes are very thick in comparison due other tapes making them more durable There is also far more adhesive than any other tape most of us are familiar with. Their thickness however is nowhere near a bithuthene membrane. These tapes stick well and stay stuck. There are many flashing tapes on the market for this specific purpose. I choose the 3M flashing tape 8067/3015 for this project due to availability and a few other properties, and what a great choice it was! The 3M flashing tape is thick and tough enough to be used as a sill pan material. I want to point out that I have no affiliation with 3m for using their product. I’m just a fan.
The tapes have a release paper for easy installation that is discarded. The 6″ version which is the best width for window flashing in my opinion, has two release tape strips which come in handy during the install. The tape can also be used over the nailing flange of your window.
Of course the one downside of using this product is it also has no back dam. I can show you how to solve that problem and create your own back dam instead of using a sill angle material, which is easy to create.
Use flashing tape and create your own custom back dam
The trick to having a back dam while using tape is the flashing tape needs to stick to something, but minimizing the profile of other materials is desired because it should not interfere with the installation of interior finishes or brick mold. The best material I could think of was using a self-adhered closed-cell foam gasket. 1/8″ high is high enough for a back dam. I got the smallest width possible which was 1/4″. After measuring the window frame, the gasket was self adhered to wood, coming up about 2″ on either side.
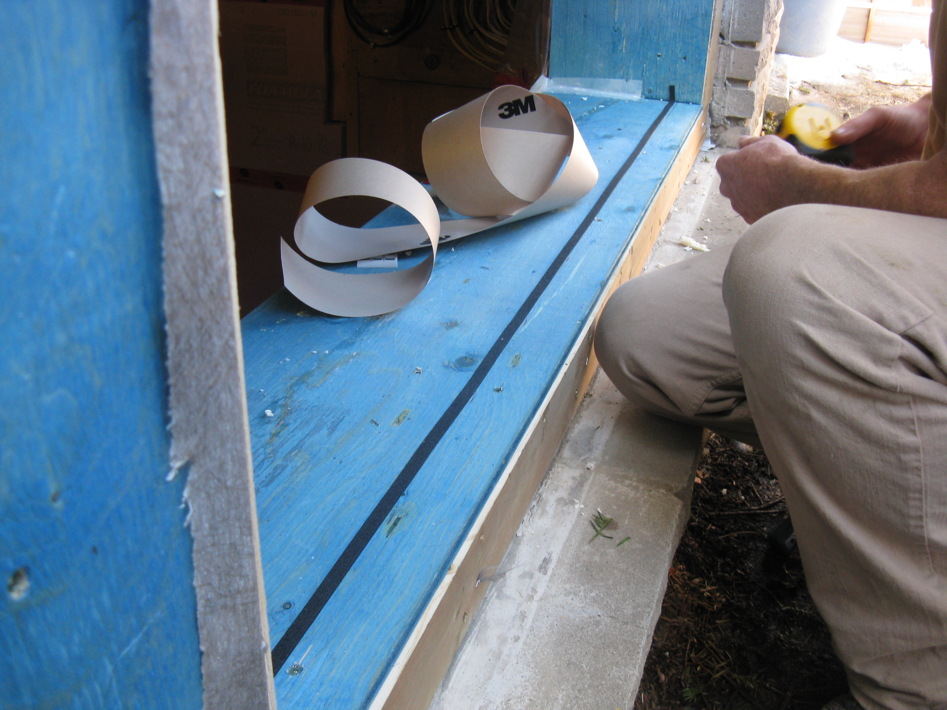
Here is the key to making this work: Only remove one side of the release paper, leaving the other one still on. This will allow you to adhere it to your WRB if it is not already installed in place. Take the edge of the tape and place it on top of the foam gasket. The tape is best adhered to the wood using a J-roller, but other methods can be used to press the tape in place to fully adhere it.
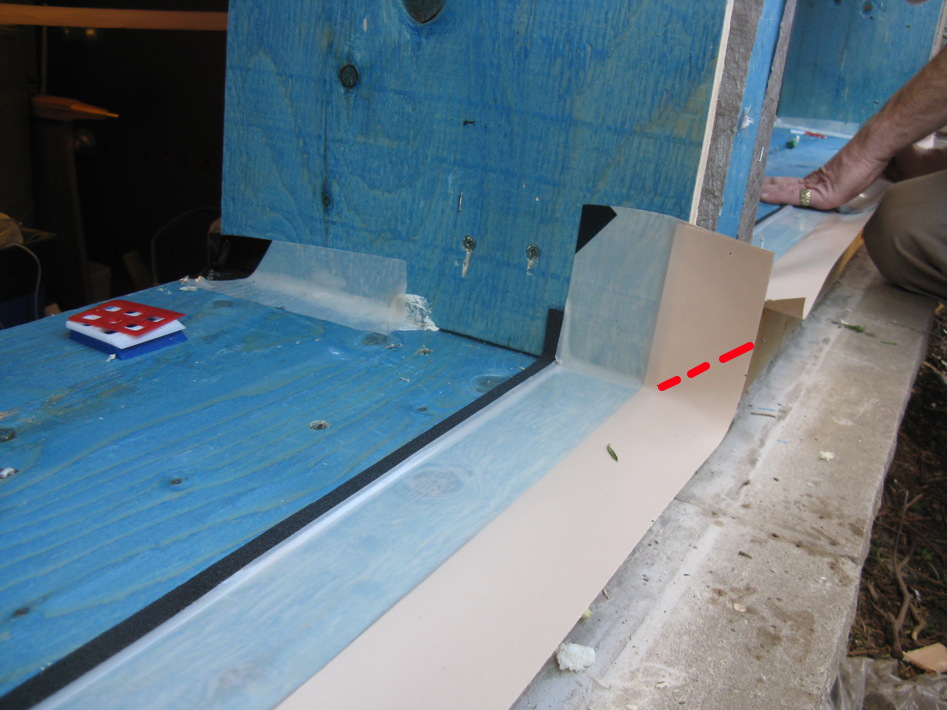
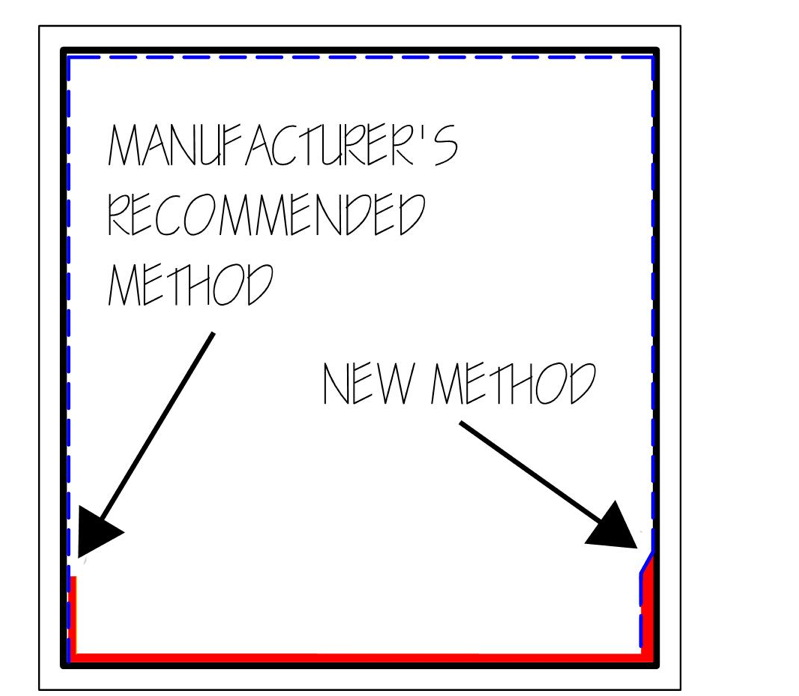
The recommended installation video provided by 3M is not wrong as there are many ways to flash a window, but the sill detail could be slightly better. The method to seal the sill is okay, but the sill connection to the jamb needs a slight adjustment in the way it drains. It is important to practice the 4D’s of moisture management in a building enclosure as best as possible.
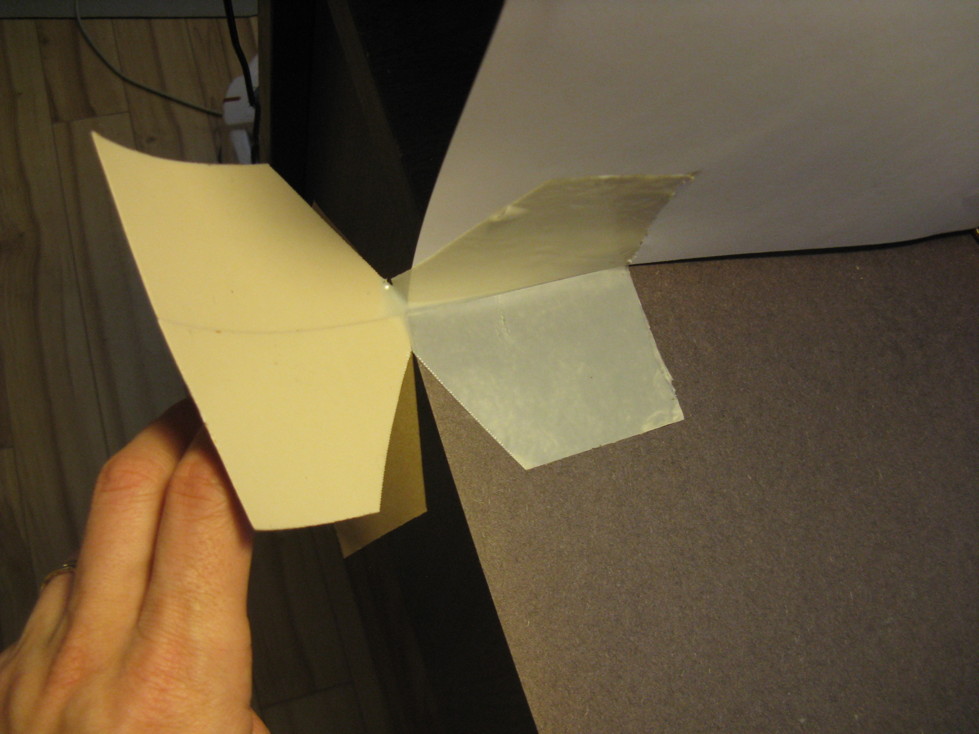
Here is another advantage of this taped sill: The connection to the jamb includes good overlapping drainage. To solve this, a scrap piece of tape is cut measuring about 6-8″ long. Cut notches in the centre so that the piece of tape resembles a bow tie. The double release paper comes in handy again as it is best to only remove and adhere one side at a time to prevent misaligned accidental taping. Only adhere one side into the corner as show below, and leave the other piece of relief paper on. Using a bow tie method has been used for a long time by many others and works great. The tape can be stretched if need be if there is a misplacement. It is very forgiving that way.
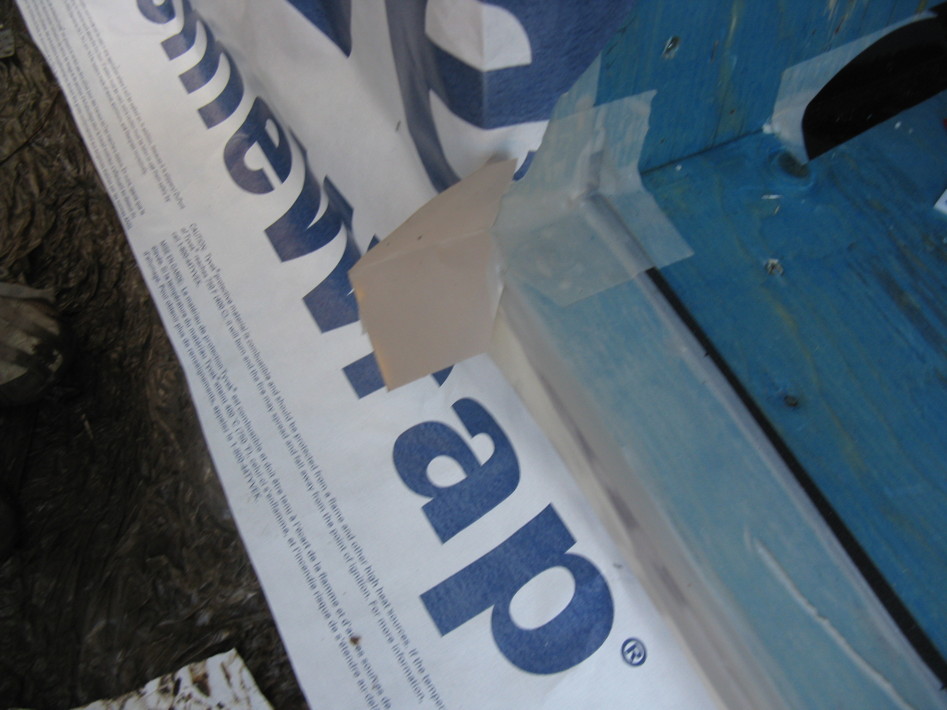
The next step involves installing the WRB on top of the rough opening and cutting out the centre. This technique allows the excess to be used to wrap around the jamb and on top of this new piece of bow tie tape we installed. Fine homebuilding has a good succinct video on how to do this. Be sure to temperately tape back any release paper inside the opening so that the WRB can be installed correctly.
Now that the WRB has been installed with staples, it is time to fully adhere the bottom half of the tape on the WRB. The bow tie can also be adhered to the WRB afterwards. The sill pan stage is now finished. Notice how every layer is properly overlapped to ensure proper drainage.
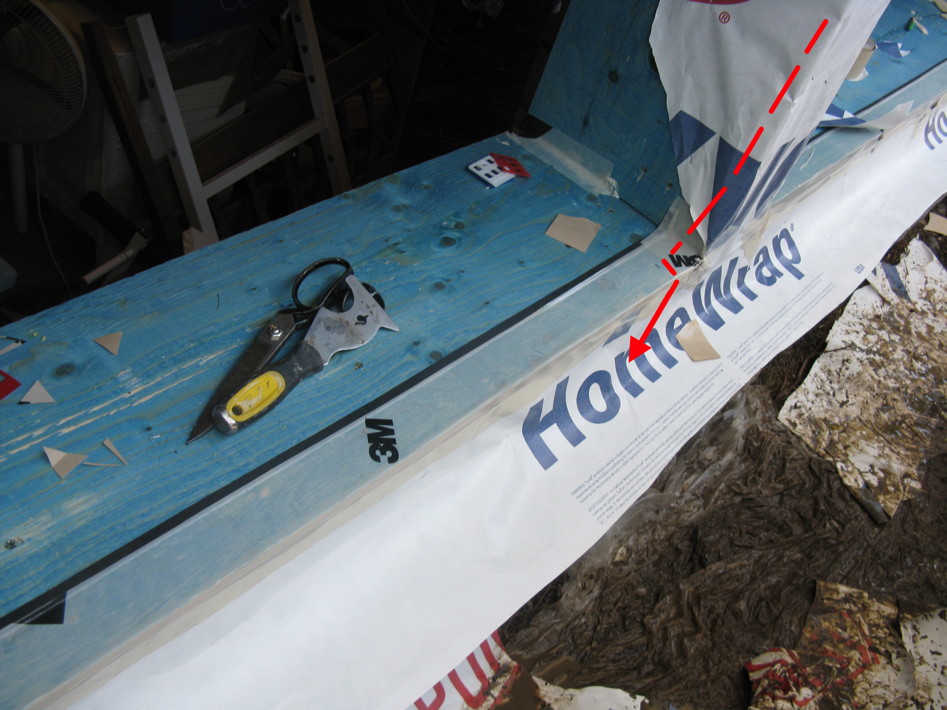
I really like how the flashing installation and final product worked out. I would use this method again in a heartbeat and recommend it to anyone. This is the best of both worlds in comparison to bituthene membranes and preformed pans. They easy to install, fully adhered, and includes a back dam.
- Always use a sill that includes a back dam even if it means making your own with a closed cell gasket
- Try to purchase tape with two strips of release paper
- Practice good drainage by ensuring overlapping layers in the jamb to sill detail
- A prefabricated sill may not be easy to acquire when you need it
- If you are using sealant, it must be compatible with both your plastic pan and/or WRB or it wont bond properly or possibly melt the plastic
- Don’t leave the tape roll on dirty surfaces because the edges will pick up that dirt. This hurts the ability to fully adhere the tape to the surface
- The tape works in a wide variety of temperatures which is good for cold weather installs as some sealants have minimum temperatures to cure
- The tape is very sticky and can be reattached if misaligned, but not after it has been firmly pressed in place. The elasticity of the tape makes it slightly forgiving


I’m very happy to find this website. I need to
to thank you for your time just for this fantastic read!!
I definitely savored every little bit of it and I have you bookmarked to see new stuff on your website.