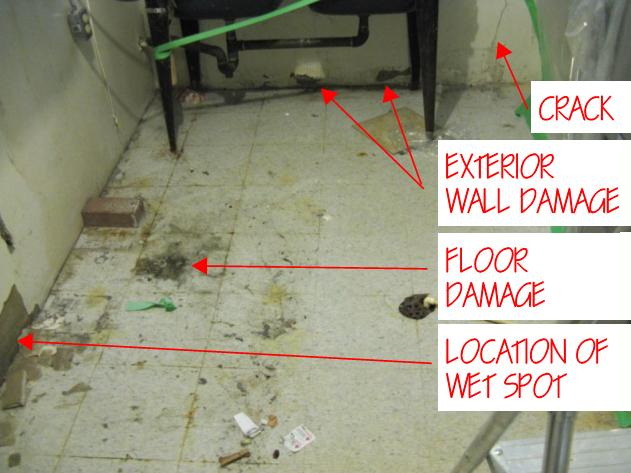
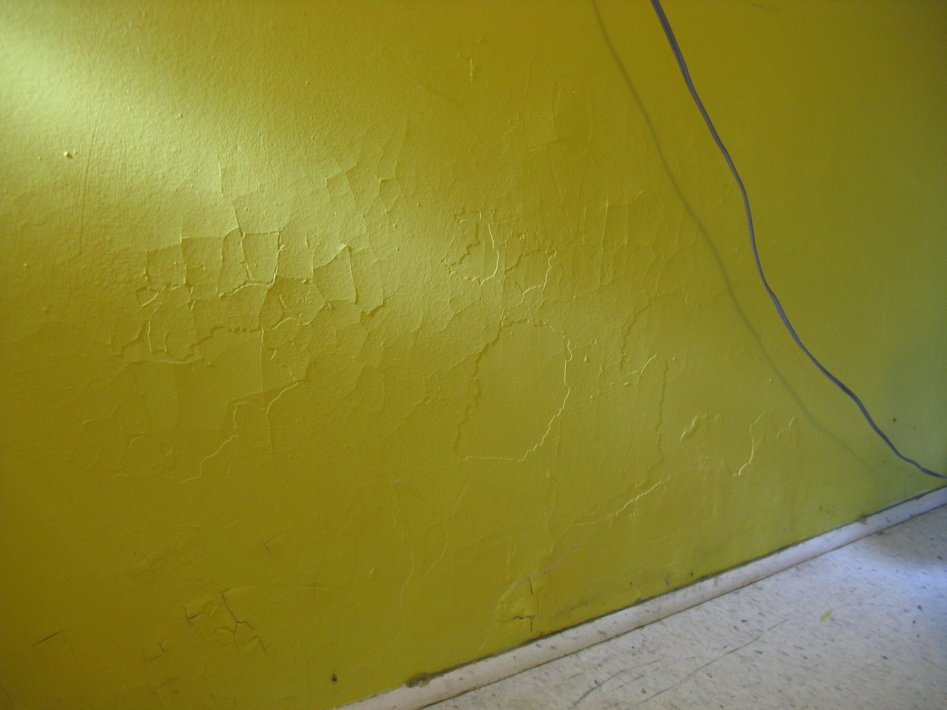
Is it really that strange that drywall should get wet after a heavy rain event? In some homes it is all too common unfortunately if you have poor site drainage, poor waterproofing or a myriad of other reasons. Sometimes a wet spot on drywall occurs along the foundation walls. In my case, after two heavy rain events in the summer of 2013, a wet spot first appeared not on the exterior wall, but on an interior partition wall in the center of the basement floor plan about 8 feet in from an exterior wall. After a few hours, the wet spot bloomed to about 3 feet in diameter. There had been damage in this location before from years before, but no issues had occurred up to this point that warranted action within the time I was living there. The floor below the wet spot was also damaged.
This was a real head scratcher. Why would a rain event cause a wet spot in the centre of the house? During the course of that rainstorm I looked for some visible leakage paths but found none. Not being able to come up with an answer, this is when the investigation began, and I broke out my toolkit.
Warning: this post is picture heavy
The investigation Begins, advice taken from foundation experts.
To determine the point of entry on the using a moisture meter, I measured the moisture content using a grid pattern on graph paper and determined where the readings were highest. The first of the two rooms, the utility room attached to the partition had plaster troweled on the exterior wall and the readings were elevated near the bottom of the wall in comparison to shoulder height, but the levels were not alarming at that moment in time. This seemed reasonably normal that the footing should have higher readings for the troweled on plaster. From the utility room photo above it is possible to see some locations where plaster has delaminated from the concrete block wall. Even though moisture levels were currently elevated, they must have once been even higher . In the adjacent room was a kitchen. Under the sink, the air had a 15-20% higher relative humidity than the room itself, and the gypsum board under the sink was also elevated to alarming levels. This did not look good, and was not possible to solve the issue definitively without more aggressive measures or exploratory openings. It was time to call in a foundation company.
I showed three foundation companies the evidence I had gathered. One of them was dumbstruck. Two of them immediately gravitated to a crack that was present near the foundation wall in the utility room in the picture shown above. However the location of the crack had a low moisture concentration in comparison to other areas recorded on the graph paper. These companies didn’t seem to be interested in any other sort of their own investigation, not even a simple walk through. They just wanted to start digging. After their pitch was done, I showed them the door.
As they left, I determined that they only way it would be fixed properly is if I solved it myself. I’m glad I did it myself, or the problem would have never been solved. The plan was after I finished my graduate studies, the project would begin.
If you dig, use a backhoe if it fits on your site. Worth. Every. Penny.
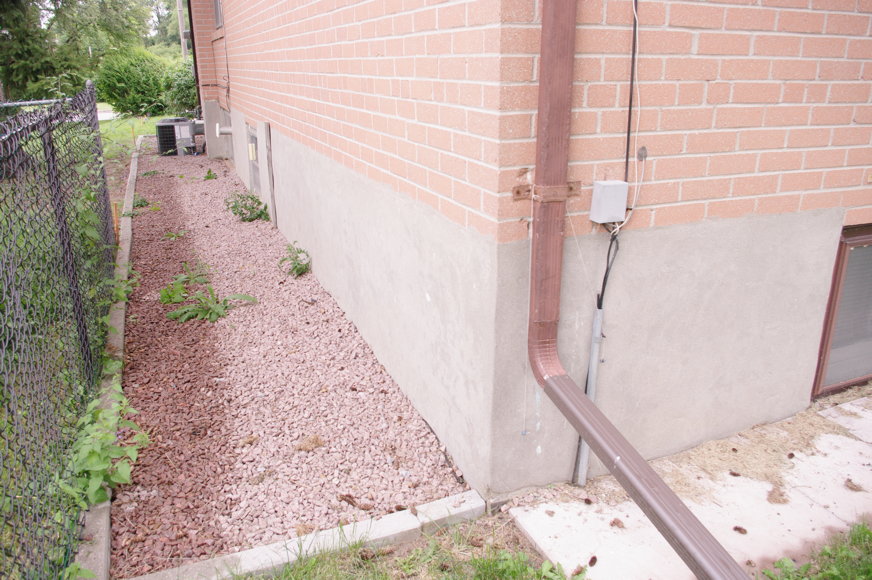
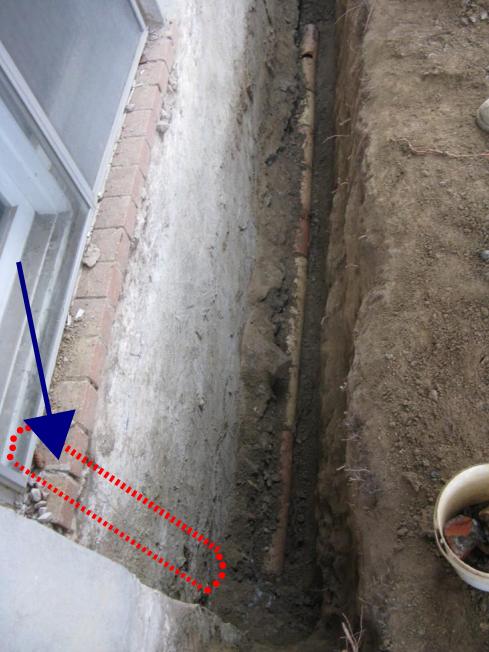
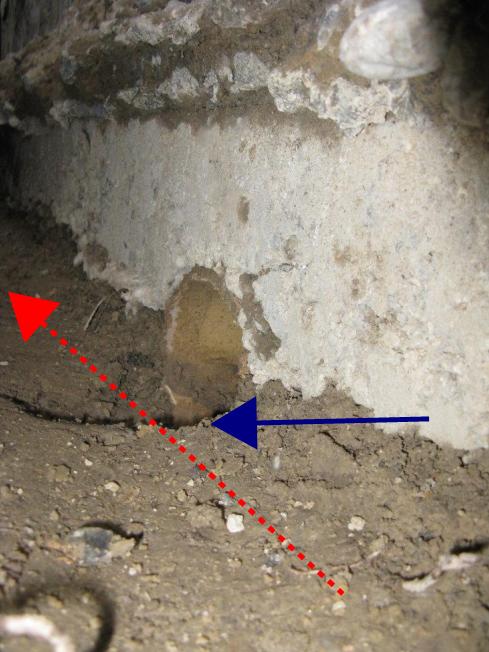
Backhoe? In this case, it would have damaged a spruce tree on the adjacent property as some roots were on the surface. The plan was to dig the area outside according to the elevated moisture grid on graph paper I gathered from the inside plaster and finish the exterior wall by modern standards. After excavation was to be completed, the weeping tile was to be scoped with a camera by a drainage company. With the help of hired labour, three people dug a hole six feet down and 18 feet across. It took us a few days and with no exaggeration, the hardest work in my life. The house had an elevated first floor, so the foundation footing was going to be approximately six feet down instead of eight. The location of the crack discovered from the interior is shown here on the exterior shown below in red It appears that there was a futile attempt in the past to patch the crack on the surface shown by the blue arrow. The mortar patch job can be seen spilling over the joint.
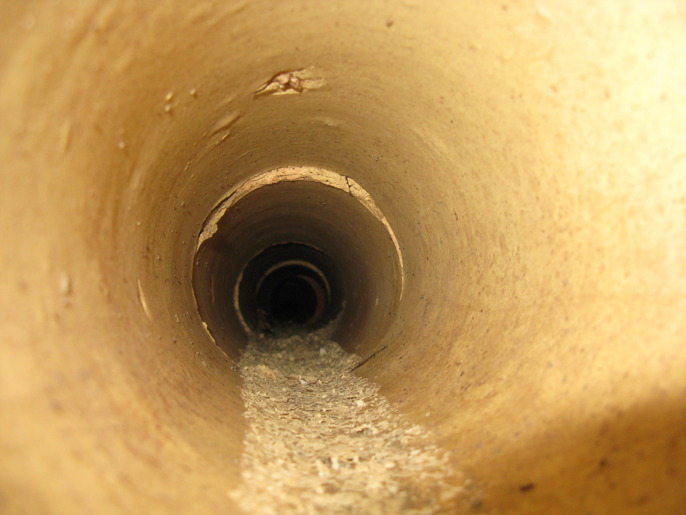
What is that?
As the digging down was almost complete, old clay weeping tile sections were removed only after they were checked for deficiencies, as after all I was looking for a smoking gun. The tile sections were good condition and the inside was not clogged. So far so good. As all of them were removed to look further down the line and something strange was discovered. There was a clay tile inside the footing going towards the interior of the house (shown below). The location of that clay pipe is slightly below the grade of the weeping tile. Most likely, all of the water passing through this point will pass through the house rather than around it to the storm water system exit location. I wondered if the difference in elevation was done by design or settlement of the foundation walls had occurred.
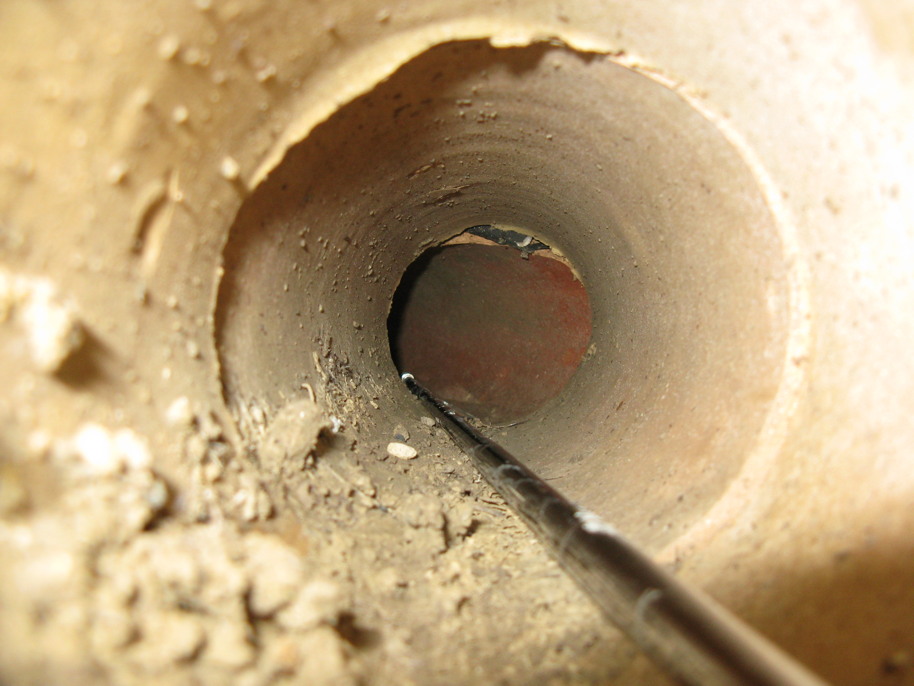
The next step was to look inside this rabbit hole as shown below. With the aid of a mirror and a camera, it was possible to see about 3 feet in as the clay tile turned about 45 degrees or so towards the utility room. It was possible it turned in the direction of the unexplained water spot in the centre of the floor plan. At this point, it was time for the drain company to scope the whole weeping tile system, and possibly see where the rabbit hole leads to.
Prognosis
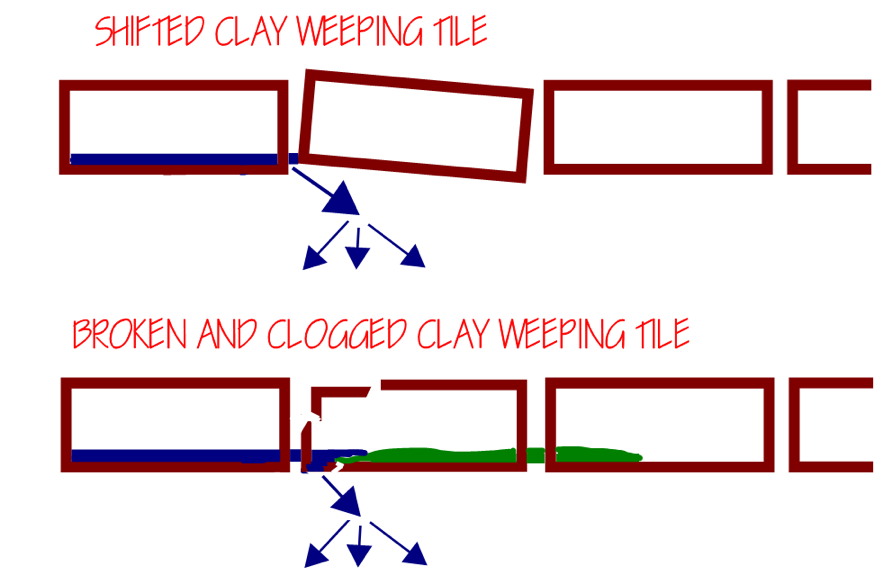
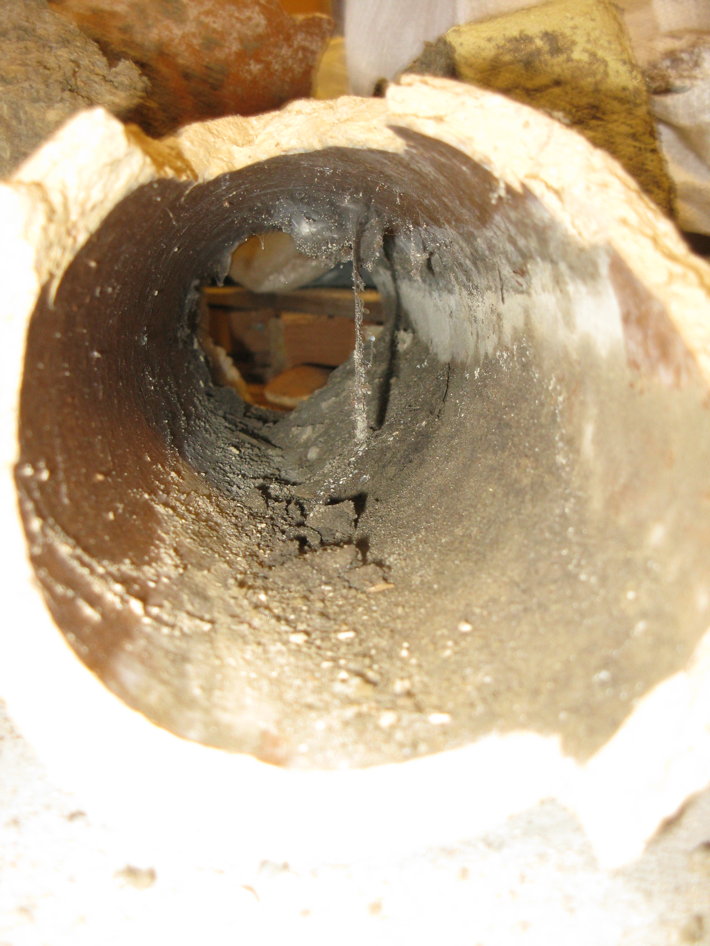
Three hundred dollars later, the camera inside the weeping tile was able to see that the exterior portion of most of the weeping tile system was clear of obstructions. No pipes were crushed but some minor shifting had occurred downstream beyond the project area by 20 feet as the pipe turned around the outside corner of the house. This info was good to know for future reference as it too will need to be replaced, but not an immediate concern. Back inside the house, it turned out that the 45 degree pipe was partially crushed, shifted and had a blockage, a trifecta for leaking water into the ground. This pipe was also tied into the main floor drain in the utility room that ran only 2 feet from under the wet spot. From the diagram below, it is easy to see how a shifted pipe can be just as be just as bad as a blockage. I had both.

Hi – how did you protect the trench from possible rain while you were working? I am going to dig down a section as well and this is my biggest concern. It will take me about a week to do the work I think and I am worried about rain water accumulating.
you can try using a tarp to divert water, but i don’t think it would help much. rain presents a safety issue with soil stability so be wary of that
Your style is unique in comparison to other folks I’ve read stuff
from. I appreciate you for posting when you’ve got the opportunity, Guess I’ll just bookmark this blog.
will try to keep it up. thanks!